Have you just started learning how to play the piano or have you come back to it after many years of not playing or practicing? This video lesson tutorial outlines a checklist every beginner (and even intermediate) piano player should take note. There are 7 techniques listed and watch until the end for a very cute footnote.
Wanna own the metronome watch Jazer is wearing? Use the promo code ‘JAZER20’ to get 20% off- https://www.soundbrenner.com/jazer
? Timestamps
0:00 Intro
0:27 Technique 1
1:41 Technique 2
2:33 Technique 3
4:50 Technique 4
5:55 Technique 6
8:49 Technique 7
Stay in touch on Instagram for bite-sized piano tutorials and lessons- https://www.instagram.com/jazer.lee/
Video Transcript:
One of the great mistakes of piano beginners is that they play lots and lots of pieces, but they don’t give enough attention to piano techniques. This limits their improvement and they’re not able to progress further in piano. In this video, I want to share with you seven different piano techniques. You can use it as a checklist to see which ones you’ve mastered pretty well and which ones you think you can improve on. Not only am I going to explain them, I’m actually going to play some musical examples from pieces to show you how they’re practically useful.
Technique Number 1 is “PEDALLING”. There are many pieces in piano that will benefit hugely from pedaling. One example of such a piece without the pedal sounds like this… With a pedal it sounds like this… The right pedal on the piano allows you to elongate and sustain the sounds of the chord, which makes it sound louder and more grand. The technique to using the pedal is basically to press down and change whenever the chord changes in the music.
Just to show you very briefly how the timing of all this works, it looks something like this. So, you play and as you change the chord, your feet come up. Change… Change… Change… Change.. Change. Change. Every time your fingers play a new chord, your feet should come up at the same time and immediately press back down.
So, it looks like this… Technique number 2 is “PIANO CHORDS”. Some may argue that all music is founded on chords. So, I think it’s really important for beginners to go and learn and understand what chords do. Without getting too deep into this, I think beginners need to know what a major chord is, what a minor chord is. And then, from there you can move on to learning chord progressions, which basically means a series of repeating chords. For example, this is C major. This is A minor. This is F major and this is G major.
You start to create some pretty decent music. So, take time to really study chords and what their purpose in music is. Technique number 3 is “ARPEGGIOS” or broken chords. This third piano technique is pretty much the same thing as technique number 2, but this time it’s broken up. So, instead of playing… you would play something like this. That’s called an ‘arpeggio’. If I were to string several rounds of that together, it would sound like this, for example C – E – G – C – E – G. I just did three octaves of the C major arpeggios.
You should, of course, practice it with your left hand too. Or even hands together. I’ll do four octaves for you. And, of course, you also want to learn other arpeggios as well. Not just C major, but eventually every possible combination of every major and every minor, and so on and so forth. Composers usually use arpeggios for a virtuosic effect. You may be familiar with this piece. It’s a piece that sounds pretty impressive.
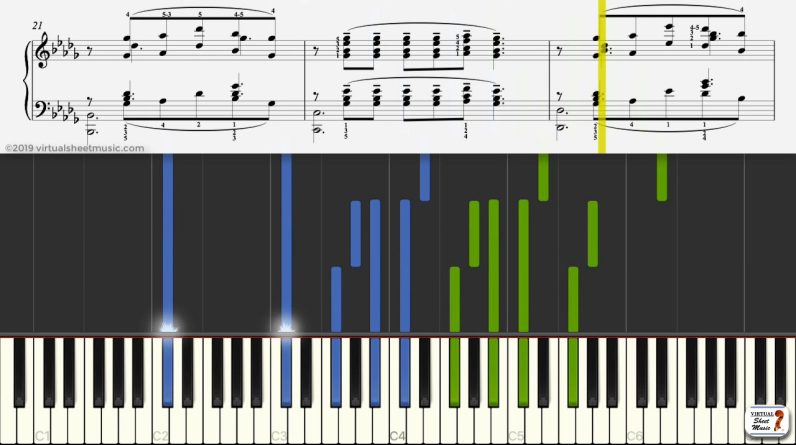
After some practice, which is what I need to do, but if you look at the right hand part… Instead of thinking “Wow! That’s a bunch of so many random notes!” What I want to help you to do is to see that it’s actually just a bunch of very simple arpeggios. So, we have basically three shapes in there. That was the first shape: G sharp, C sharp, E and G sharp. Okay, shape number 1, shape number 2 was this one. Shape number 3 was this one and it just repeats again and again.
Okay, number one, number two, number…
When you take time to learn and understand arpeggios, you can do some very virtuosic patterns that actually are just repeating notes. When you can play arpeggios really fluently, it shows that you have very good technique. Technique number 4 is an interesting one.
It’s not something you’re really doing on the piano per se. Tech number 4 is “PRACTISING WITH A METRONOME”.
One of the common mistakes I see all the time beginners make is not following in time. For example, doing something like this… As you can hear from that playing there, it wasn’t really following a steady sense of pulse.
There are a couple ways you can mitigate this. Number 1 is simply just to record yourself with your smartphone. Click record and then listen to that recording. And compare it to the actual recording and see if there are any unintended long or short breaks in your music.
Another way to mitigate this is, as in our checklist, technique number 4 is to practice with a metronome.
For the past few months, I’ve been practicing not with my traditional metronome anymore, but I’ve been using this little toy on my wrist. I click a beat and it basically gives me a very strong vibration on my wrist. It just always helps me to check if I’m staying in beat. Check out the link in the description for a discount code of 20%. Technique Number 5 is “OCTAVES”.
Octaves are potentially a pretty tension-inducing technique, especially for smaller hands. So, make sure you’re practicing them with a relaxed wrist and a relaxed arm. To start, you can just play the very basic C major scale. Octaves are found in all kinds of music. One example is… That was Turkish March by Mozart. Technique Number 6 are your “MAJOR and your MINOR SCALES”. Let’s do some easy ones.
A major scale sounds like this… And a minor scale sounds like this. There are a few types, but let’s do the most famous one, which is a Harmonic Minor.
Let’s just go back to Major Scales for a second. As piano players, eventually we actually want to learn the scales for all the possible keys. So in piano, there are 12 keys. Right, 1 – 2 – 3 – 4 – 5 – 6 – 7 – 8 – 9 – 10 – 11 – 12. And it just repeats after that. 1 – 2 – 3 – 4 – 5… because it goes back to C. So eventually, over time, this might take a few months or maybe even a few years. You want to be able to play at least all the majors, hopefully all the minors as well, starting on every different key. So, for example, I’ve already showed you the C major. A D major sounds like this… As you could see there, D major actually had two black notes in it.
If I played the D major scale but I didn’t play the black keys, it wouldn’t sound correct. See? That sounds wrong, but if instead of the white, I play the black next to it, it sounds correct. Let’s do another one on E major. That one has even more sharps. It has a total of four black notes. As a beginner, you want to get familiar with how to play major scales, starting at least from all the white notes. Knowing and playing major and minor scales are good not just for technique, but also for your theoretical knowledge as well.
For example, if I had to learn a piece in E major, I wouldn’t have too much problem learning the piece. I would learn it pretty quickly simply because I practice E major scales a lot. And I understand the system of E major, which is to have four sharps in it – F sharp, C sharp, G sharp, and D sharp.
This is a pretty deep topic to cover in just this little short video, but make sure you’re taking time to study and knowing what the notes are in the different major and minor scales. Last, but not least, Technique Number 7 are “CHROMATIC SCALES”.
A chromatic scale sounds like this… It basically means, in whichever direction you’re going, to play all the possible notes on the piano. That was one octave of the C chromatic. I suggest you to learn how to play with your right hand, how to play with your left hand, and also eventually to learn how to play them together. A really good exercise and technique for you to have. So, there you go, that was a checklist of seven different piano techniques. Let me know in the comments which ones you do pretty well with and which ones you have a little bit more time with.
Happy practicing! I’m going to go teach Milo some piano now. I’ll see you in the next video. Bye! Bye! Bye!
- Deck the Halls for Piano Solo – Christmas Sheet Music – Practice Video - November 20, 2025
- Canon in D by Pachelbel | Simplified for Piano Solo | Practice Video - June 22, 2025
- Pianoforall Free Sample Lesson - March 23, 2025


